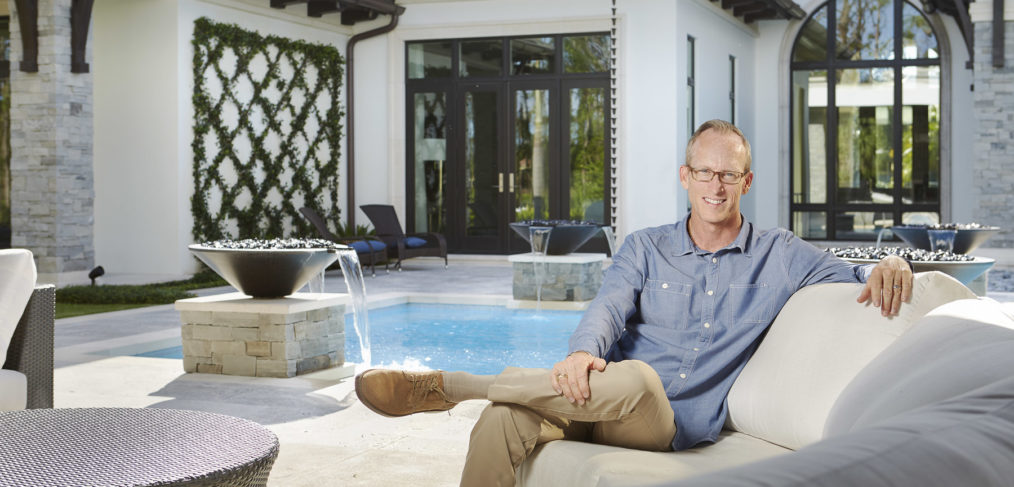
What really goes into a creating your final Business Portrait.
Ever wonder exactly how a final photograph or business portrait is all put together ?
Most people see hundreds of business portraits every week online, on tv, in magazines, pretty much everywhere you look you’ll see someones profile shot.
Well i just wanted to give you an idea of what really goes into creating your final environmental business portrait.
Not every shoot requires this much post production but i just wanted to show how this particular shoot for www.Profilesofdistinction.com magazine of Scott Windham of Windham Studios (landscape architects in Naples Florida) ended up being put together after all the frames were taken.
1 – Original image, test shot, available light.
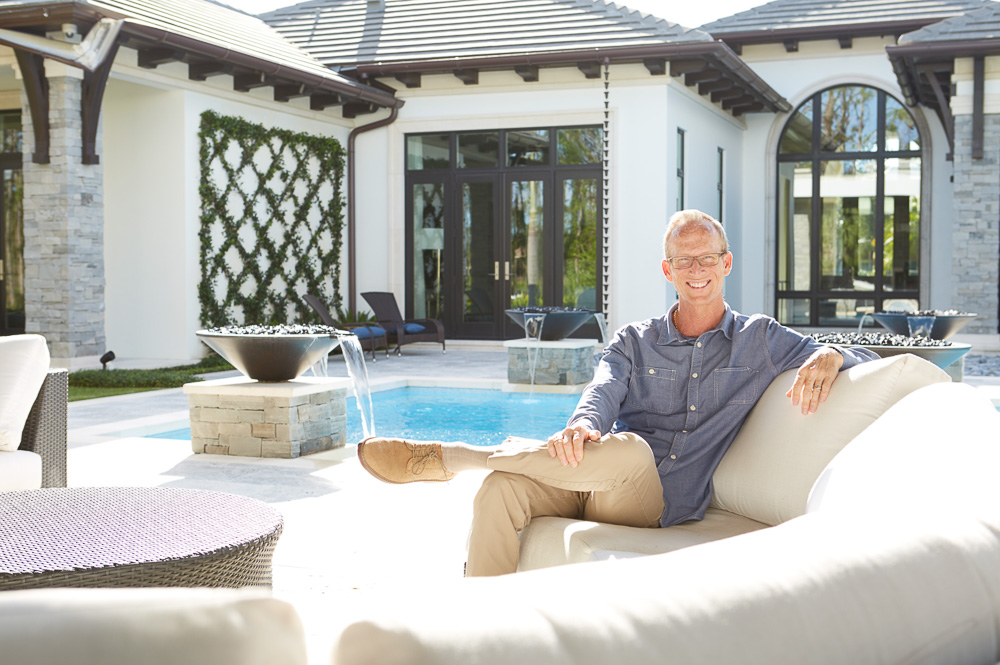
This is the original test shot, auto exposure – You can see the lovely sunlight pouring in from behind Scott as well as the blown out areas. All in all this is a pretty good start, we just need to control the light a bit, once i saw this i new this was going to be an awesome business portrait. The light on Scott’s face and rim light from sun is just too much.
2 – Test exposure frame, looking for detail in blown out sunlit areas.
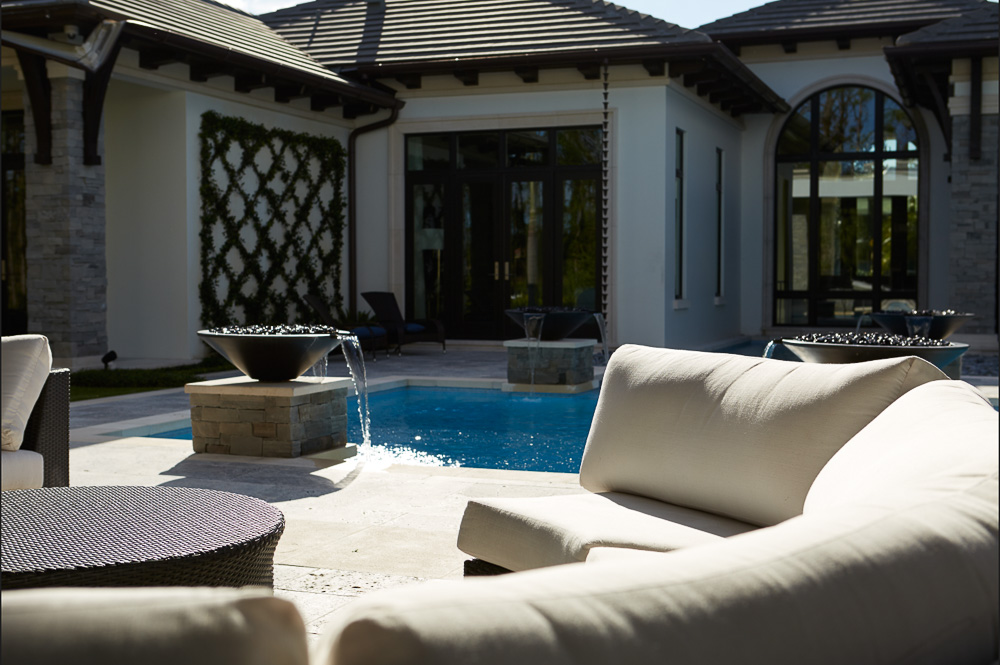
This is simply a darker exposure that will be used to pull back the details of the stone around the pool, the sofa up front and the backlit water features. As long as the camera does not move, every frame will line up for the final retouched version.
3 – Lighting Scott separately.
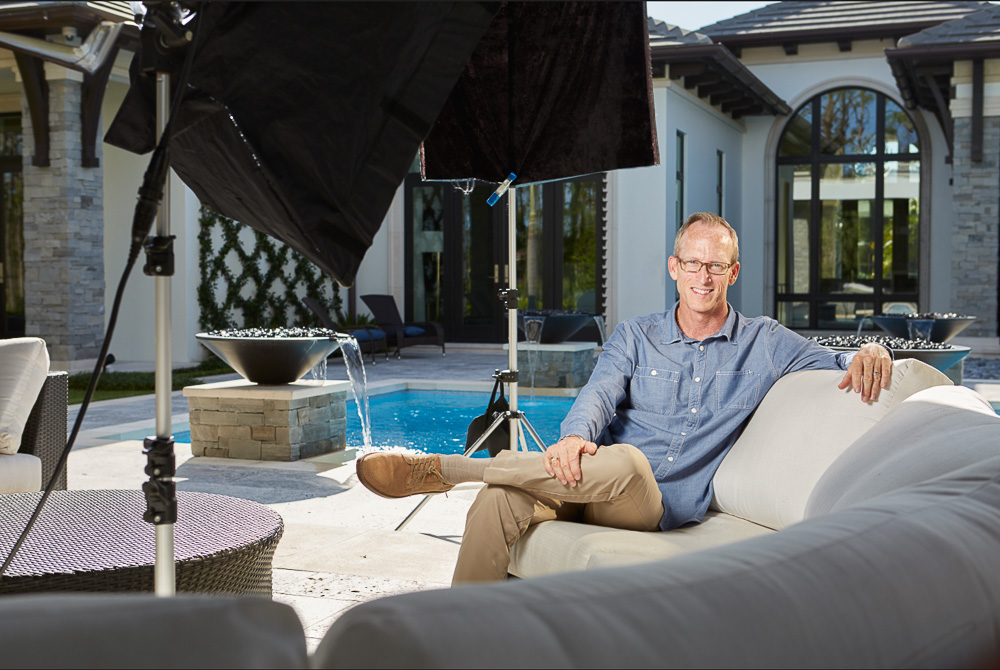
This is the proper lighting on Scott now, while blocking the sun off of his back. I’ve lit him with a front/left soft-box and a grid from behind on the right ( to mimic hard sun and highlight) as well as a reflector (out of frame) bouncing some extra light onto his left side, filling in where the grid falls off. There is a lot of gear in this shot but again, with the other background images i’ll be able to merge the correct exposed frames with no equipment in the back. You can see how this business portrait is starting to all come together.
4 – Corner Eavestrough frame to replace damaged in original.
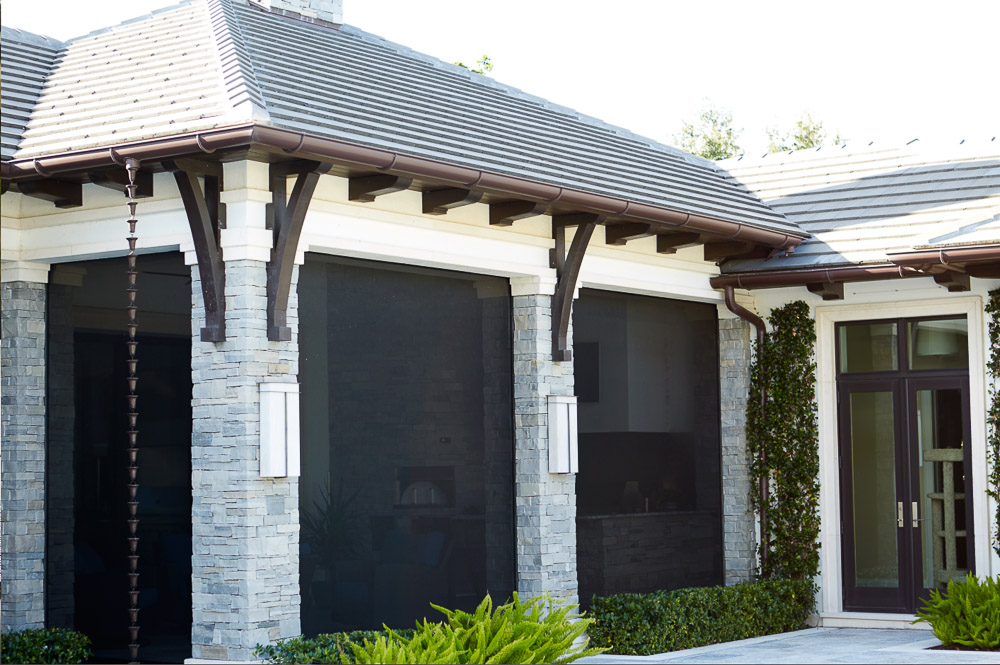
For those of you with a keen eye, you might have noticed in the top left hand corner of the last 3 images, the eavestrough was damaged by a flying palm tree during hurricane Irma a few weeks earlier.So i found something similar from a different part of the house and blended that in as well. I made sure my i shot this image from approx. the same angle as the portrait angle so its perspective lined up.
5 – The Final image
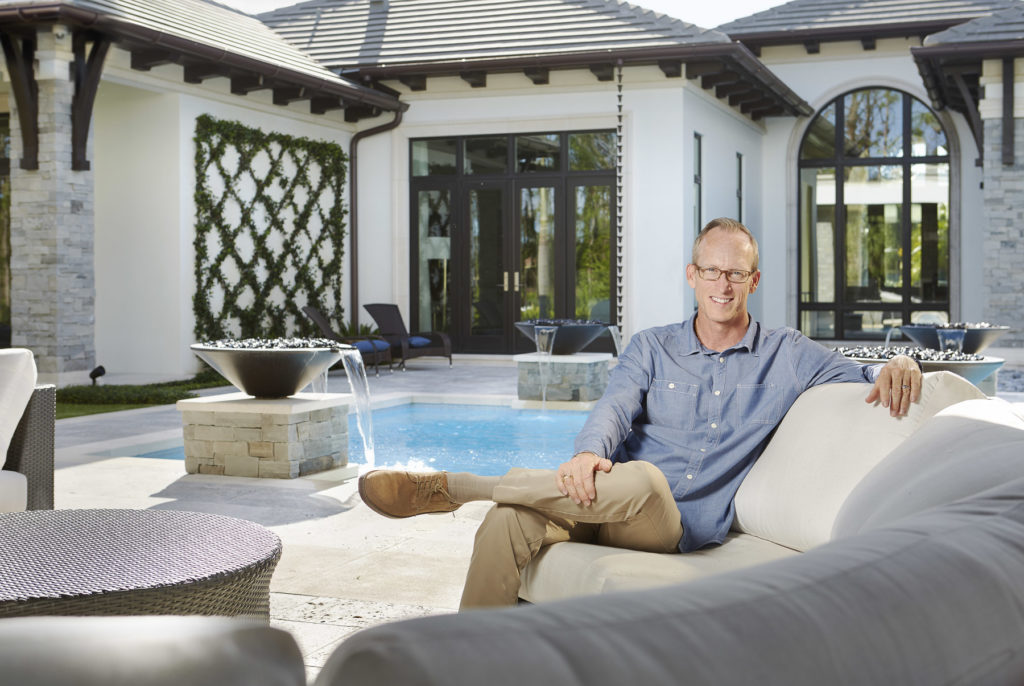
The Final Image – I’ve blended all the elements together here to come up with Scotts final business portrait. From my perspective when on location, i asses all elements (natural light options / strobe lighting options / background / post production tricks/additions) while taking the test images. Once i feel i’ve got all the images i need, i drop them on the laptop and sit down with the client to show them all the elements we have to work with and how i see creating the final look and feel of the shot. What i really like about Scotts photo is the natural, comfortable feeling you get from him in the photo, he is a very laid back individual and as his bio reads – “We build an intimate connection with our clients, who they are and how they live.”. I feel this image really represents what Scott brings to the table as a landscape architect, an individual and convey how you’ll be treating during the process.

If you want to use the photo it would also be good to check with the artist beforehand in case it is subject to copyright. Best wishes.
There is definately a great deal to know about this topic. I love all the points you have made.
I really like your article. Interesting content. This information is magnificent. I enjoyed reading what you had to say.